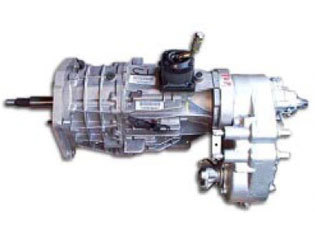
NV3550 Transmission – 5 Speed for Early Bronco
This page is dedicated to providing instructions to install the NV3550 5-Speed Manual Transmission into a 66-77 Ford Bronco. We also offer a 7-part video series covering this installation, if you're more of a visual wrencher.
NV3550 Transmission 5 Speed is Great for an Early Ford Bronco
The NV3550 transmission is an ideal transmission swap for the early Broncos. This 5 speed is rated at 300 ft./lbs. at 7200 GVW. A stock Bronco weighs 4200 GVW. When installed into a Bronco, the NV3550 can then handle an even a higher torque rating due to the lower vehicle weight – so strength is not an issue. The weight of this 5 speed is 97 lbs., which is similar to the stock 3 speed & 4 speed transmissions. The overall size and length make it an ideal fit. This transmission will adapt to either the stock Dana 20 or to our Atlas transfer case.

Installing the NV3550 Transmission in Early Bronco
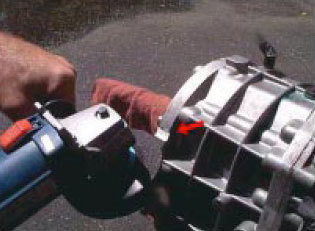
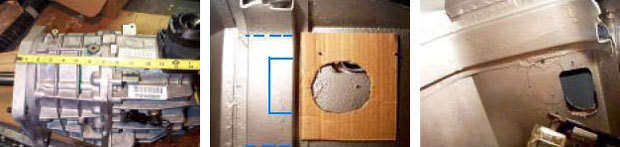
Preparing the NV3550 transmission for the bellhousing adapter
Match the bellhousing adapter to the front of the NV3550. Mark the transmission where the top two holes of the adapter meet the front flange. A small notch will need to be ground into the flange to provide clearance for the bolts. Carefully use an angle or die grinder to grind the clearance for the bolts. NOTE: The NV3550 transmission has an aluminum case. This material grinds very easily.
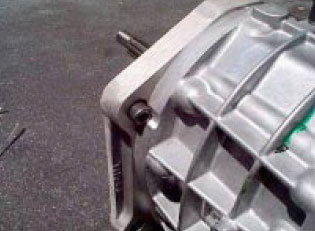
Bellhousing adapter plate installation
Install the bellhousing adapter plate to the NV3550 using (9) Allen bolts supplied.
NOTE: Use Loctite.
Removing the original transmission
Remove the driveshafts, shifter cables, and exhaust (if necessary).
Remove the original transmission and transfer case assembly from the vehicle. Leave the bellhousing in the vehicle.Transfer case adapter to Dana 20
Remove the transfer case adapter and stub shaft from the original transmission. Apply the new AA gasket to the transfer case. Aligning the transfer case adapter with the most clockwise holes will match to the factory indexing (lowest setting). You can use the other set of holes for a higher rotation; however, this can cause some problems with body
clearance, frame clearance, and transfer case shifter linkage alignment. The higher rotation does give you better ground clearance and is a nicer fit on to the new crossmember mount provided. Once you have chosen the rotation, use Loctite and install the (6) Allen bolts.Installing the adapter and transfer case assembly to the NV3550
Grease the NV3550 tail shaft splines and install the stub shaft & bearing assembly. Apply light grease to the o-ring and attach the transfer case to the transmission with (6) bolts using Loctite. Use the driver’s side top 2 bolts to attach the transfer case shifter bracket.
Prepare the body for the shifter hole
Measure the NV3550 (with the front adapter plate installed) from the edge to the shift tower. It is best to make a template. Measure the location on the body to be cut for the new shifter.
NOTE: To find your measurement, it is best to do this with the bellhousing still installed.
Removing the bellhousing and clutch assembly
NOTE: It is recommended that the flywheel be turned and new throw out bearing be installed with the new clutch disk.
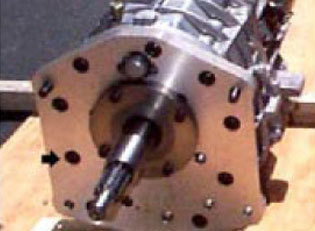
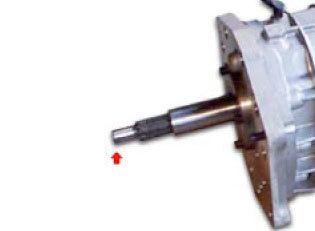
Checking flywheel pilot shaft hole depth
The NV3550 has a slightly longer pilot shaft than the factory 3 speed. The factory Ford flywheel should have enough depth to accommodate this; however, if it does not, up to 1/4″ may have to be trimmed off the end of the shaft. A simple angle grinder with a cutoff wheel is suitable.
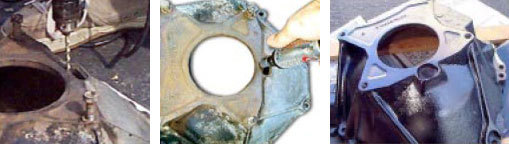
Modifying the factory bellhousing to match the NV3550 transmission
Match the bellhousing to the transmission to measure the clearance.
1. Drill holes at the bottom of the existing vent hole to widen it.
2. Use a die grinder to smooth out the hole shape.
3. The final shape should be large enough to clear the front shift rail of the NV3550 transmission. This relief should not be cut down into the bellhousing index diameter.
Match the bellhousing again to the transmission to confirm clearance when bolted together.
Installing the new clutch and bellhousing assembly
Use Loctite on the flywheel bolts if they were removed. Remove the original pilot bushing from the flywheel and install the new AA pilot bushing (do not grease pilot bushing).
Install the new disc and pressure plate to the flywheel. Install the new throw out bearing and arm to the bellhousing and grease with an anti-seize lube.
Install the bellhousing and torque to factory specifications.
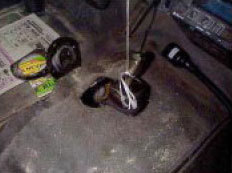
Installing the shifter into the body hole
Remove the shift tower from the NV3550 (4 bolts). Slide it through the hole in the body and use a string to hold it in place. This makes the transmission installation easier , as the shifter tower does not interfere with the body. When removing the shifter tower, make sure the shifter hole on the transmission is covered to keep debris out of the transmission.
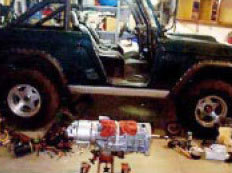
Installing the NV3550 transmission assembly into the Bronco
We recommend using a transmission jack. Once the transmission has been installed and bolted to the bellhousing, you will be required to reinstall the transmission shift tower.
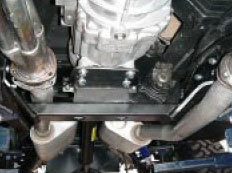
Installation of the NV3550 transmission crossmember
For installation, click on: Installation of the Transmission Crossmember page.
More Ways To Get Help & Learn More