High Torque Mini Starter Installation
Before You Begin
Please note that there are multiple ways to configure the wiring on the mini starter. Please make sure to read the directions carefully. The starter has its own solenoid, so the starter solenoid on the wheel well is no longer required to operate the starter. However, there are other components attached to the starter solenoid that draw power from the battery that are still necessary. The configuration that is closest to stock and the one we would recommend for simplicity would retain the original starter solenoid, maintain the same starter cable mounting location, and be less likely to have a short to ground due to wire chafing.
Instructions
Disconnect battery cables from battery before beginning.
Remove and save the two ⅜” bolts holding the original starter to the bell housing.
Disconnect the power cable from the old starter. This would be a good time to inspect the ring gear and mounting holes for any defects.
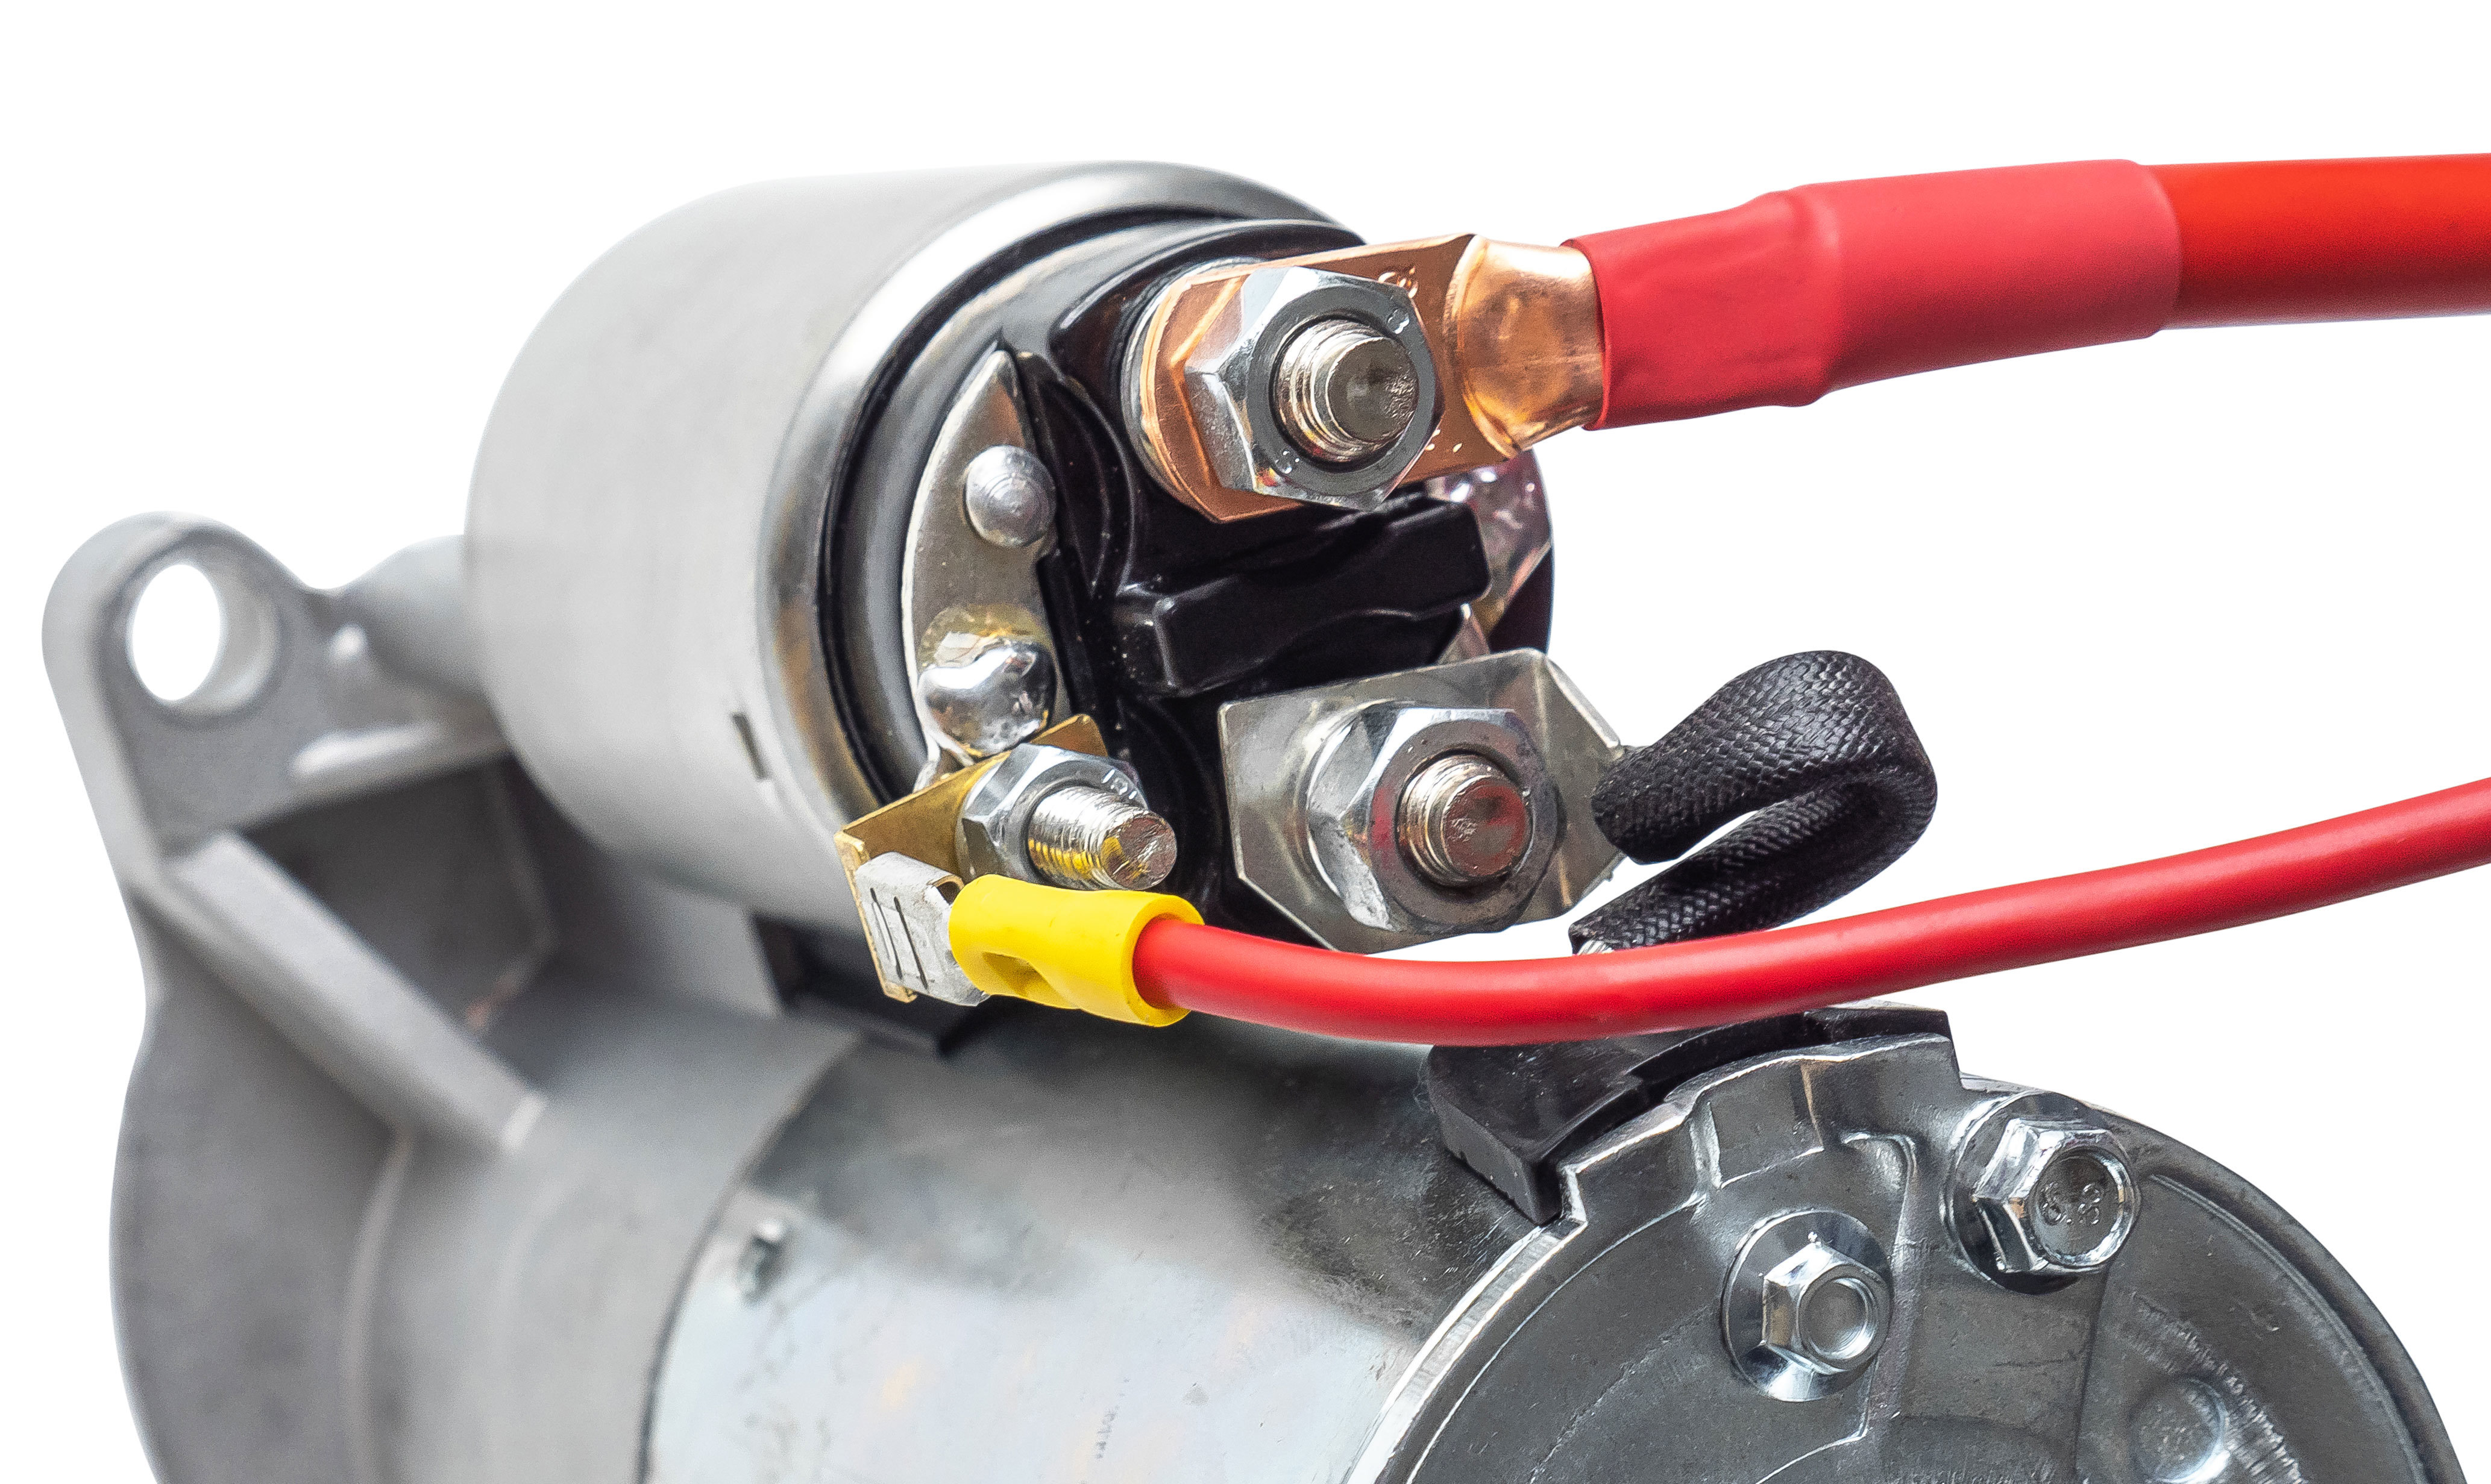
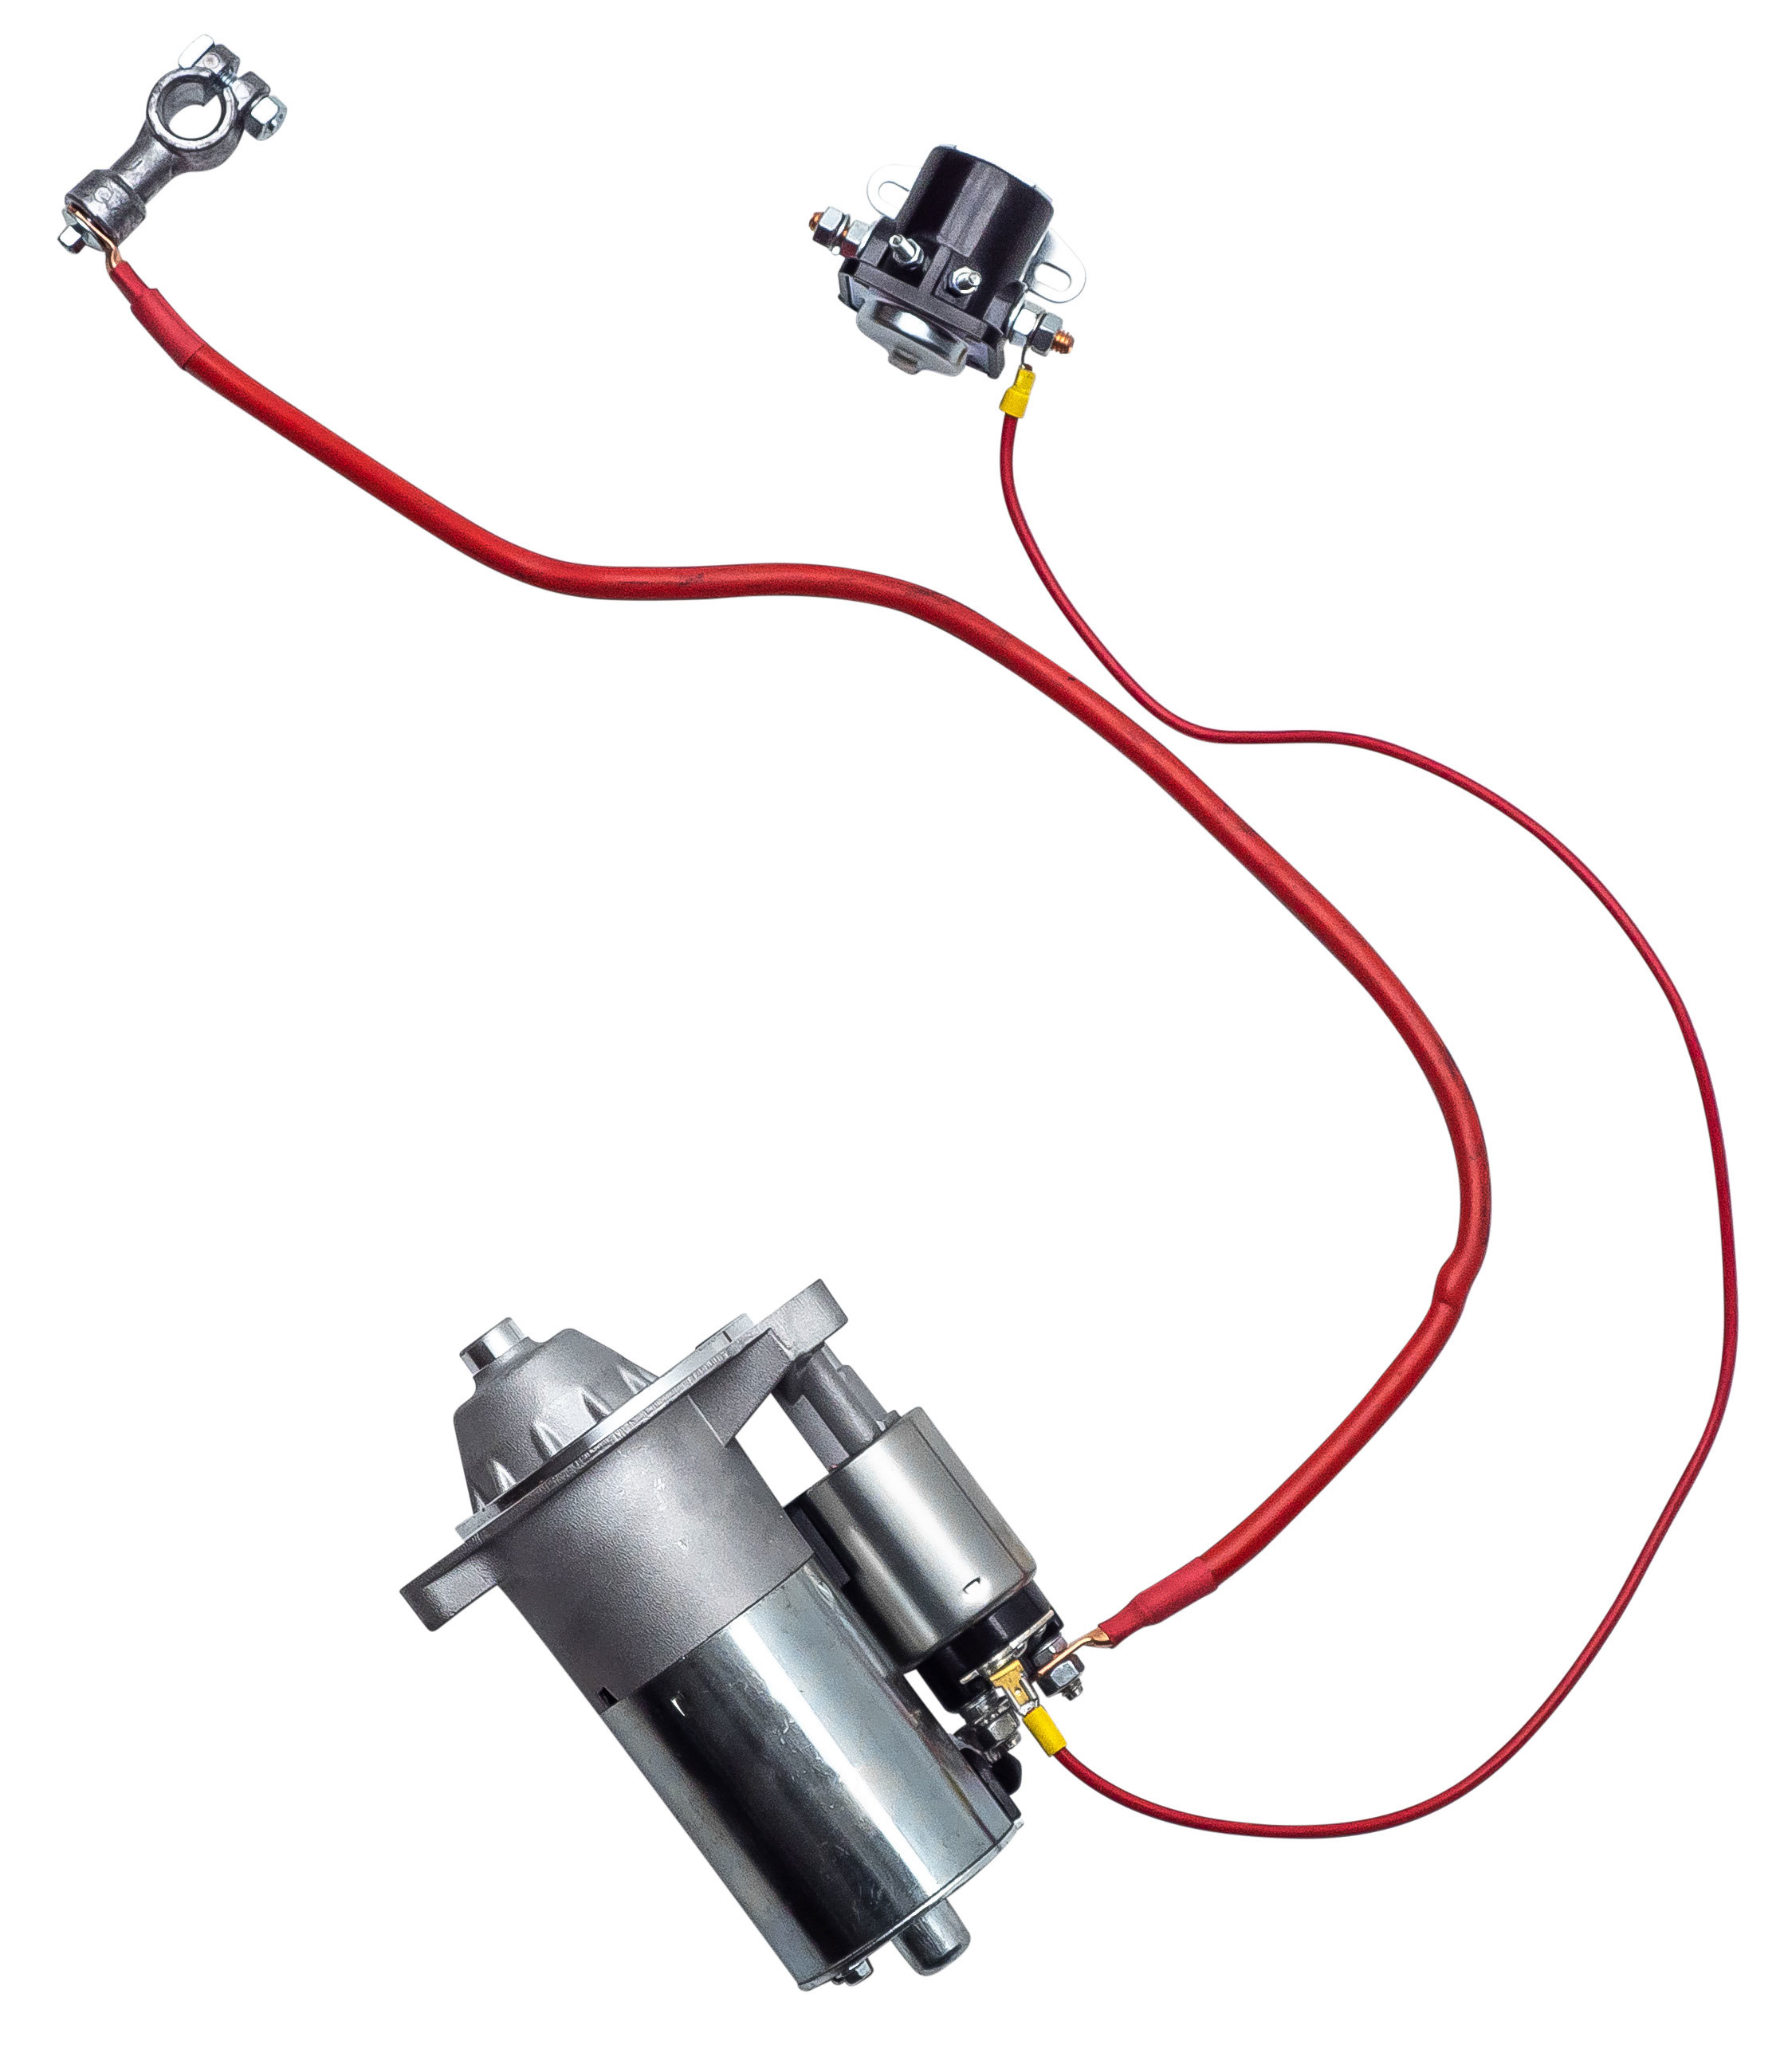
On the new starter, attach the main power cable to the uppermost large stud with the supplied nut and lock washer (13mm wrench) (See Image 1).
Attach 10 gauge wire using the supplied flat blade terminal to the small flat post.
Choose Wiring Routing:
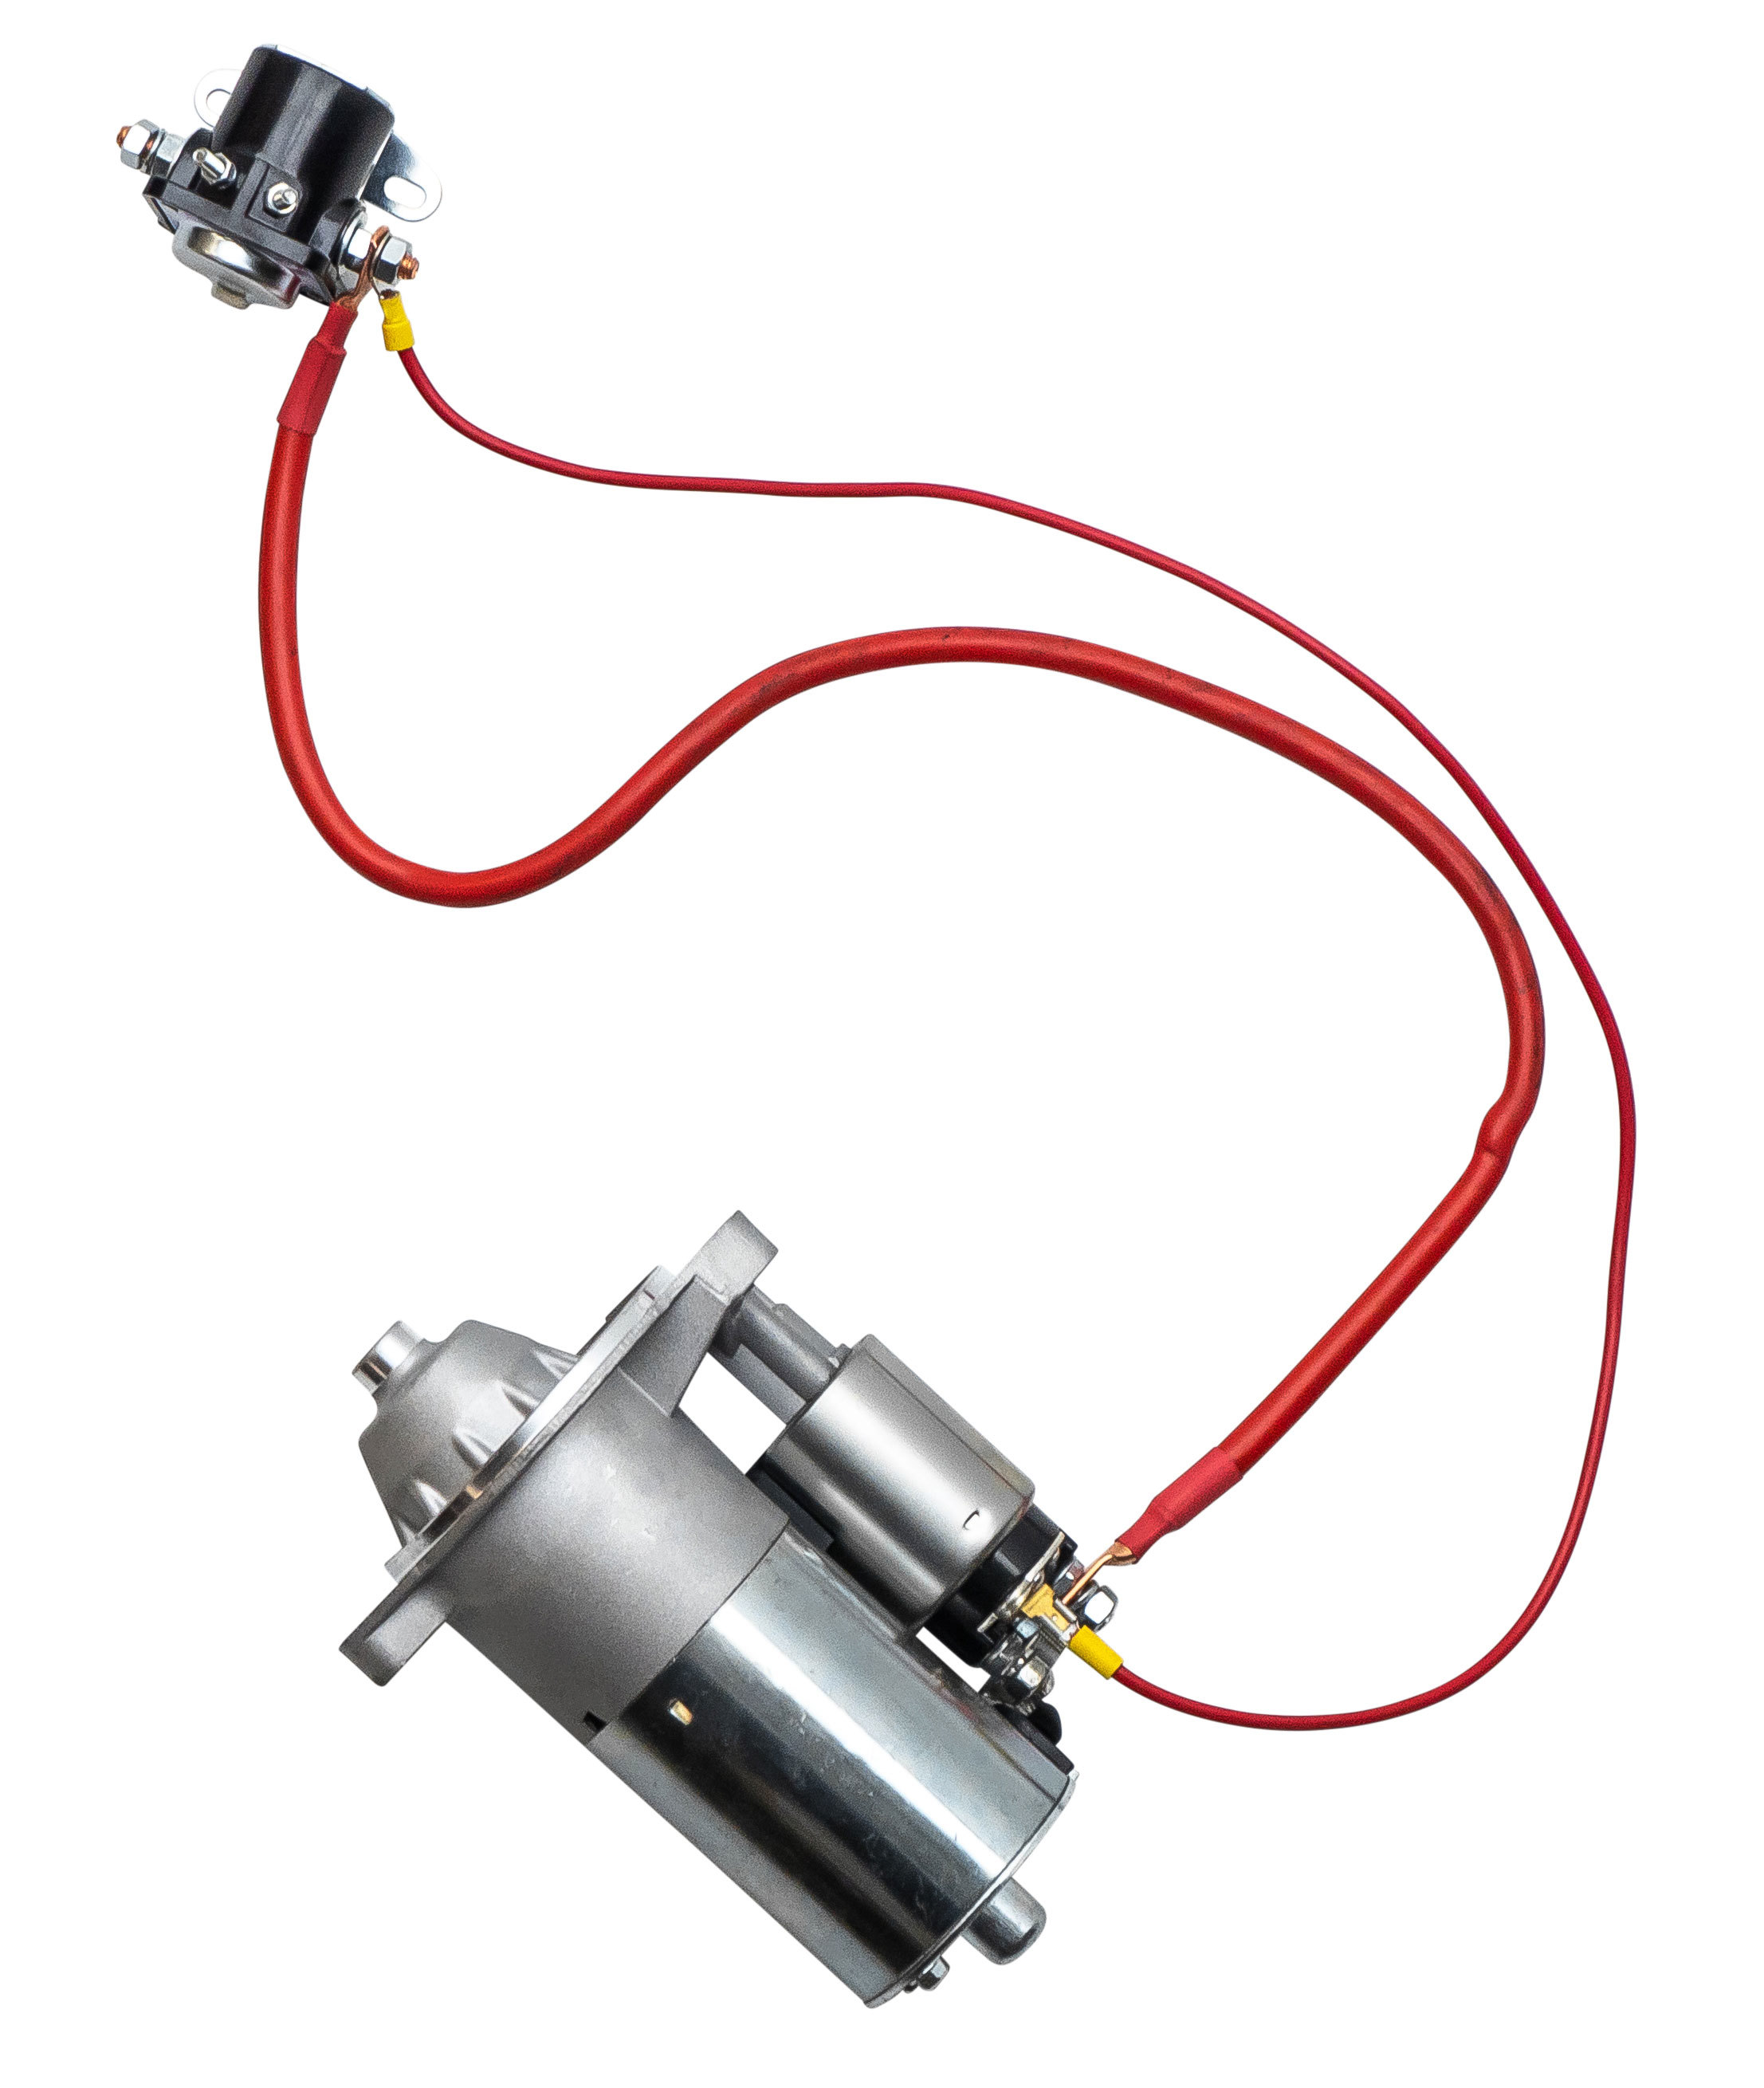
A. Option 1: You have an option to run the 10 gauge wire alongside the main starter cable up to the starter solenoid on the wheel well, attaching it to the same side of the Bronco solenoid as the starter cable (Images 2a and 2b)*.
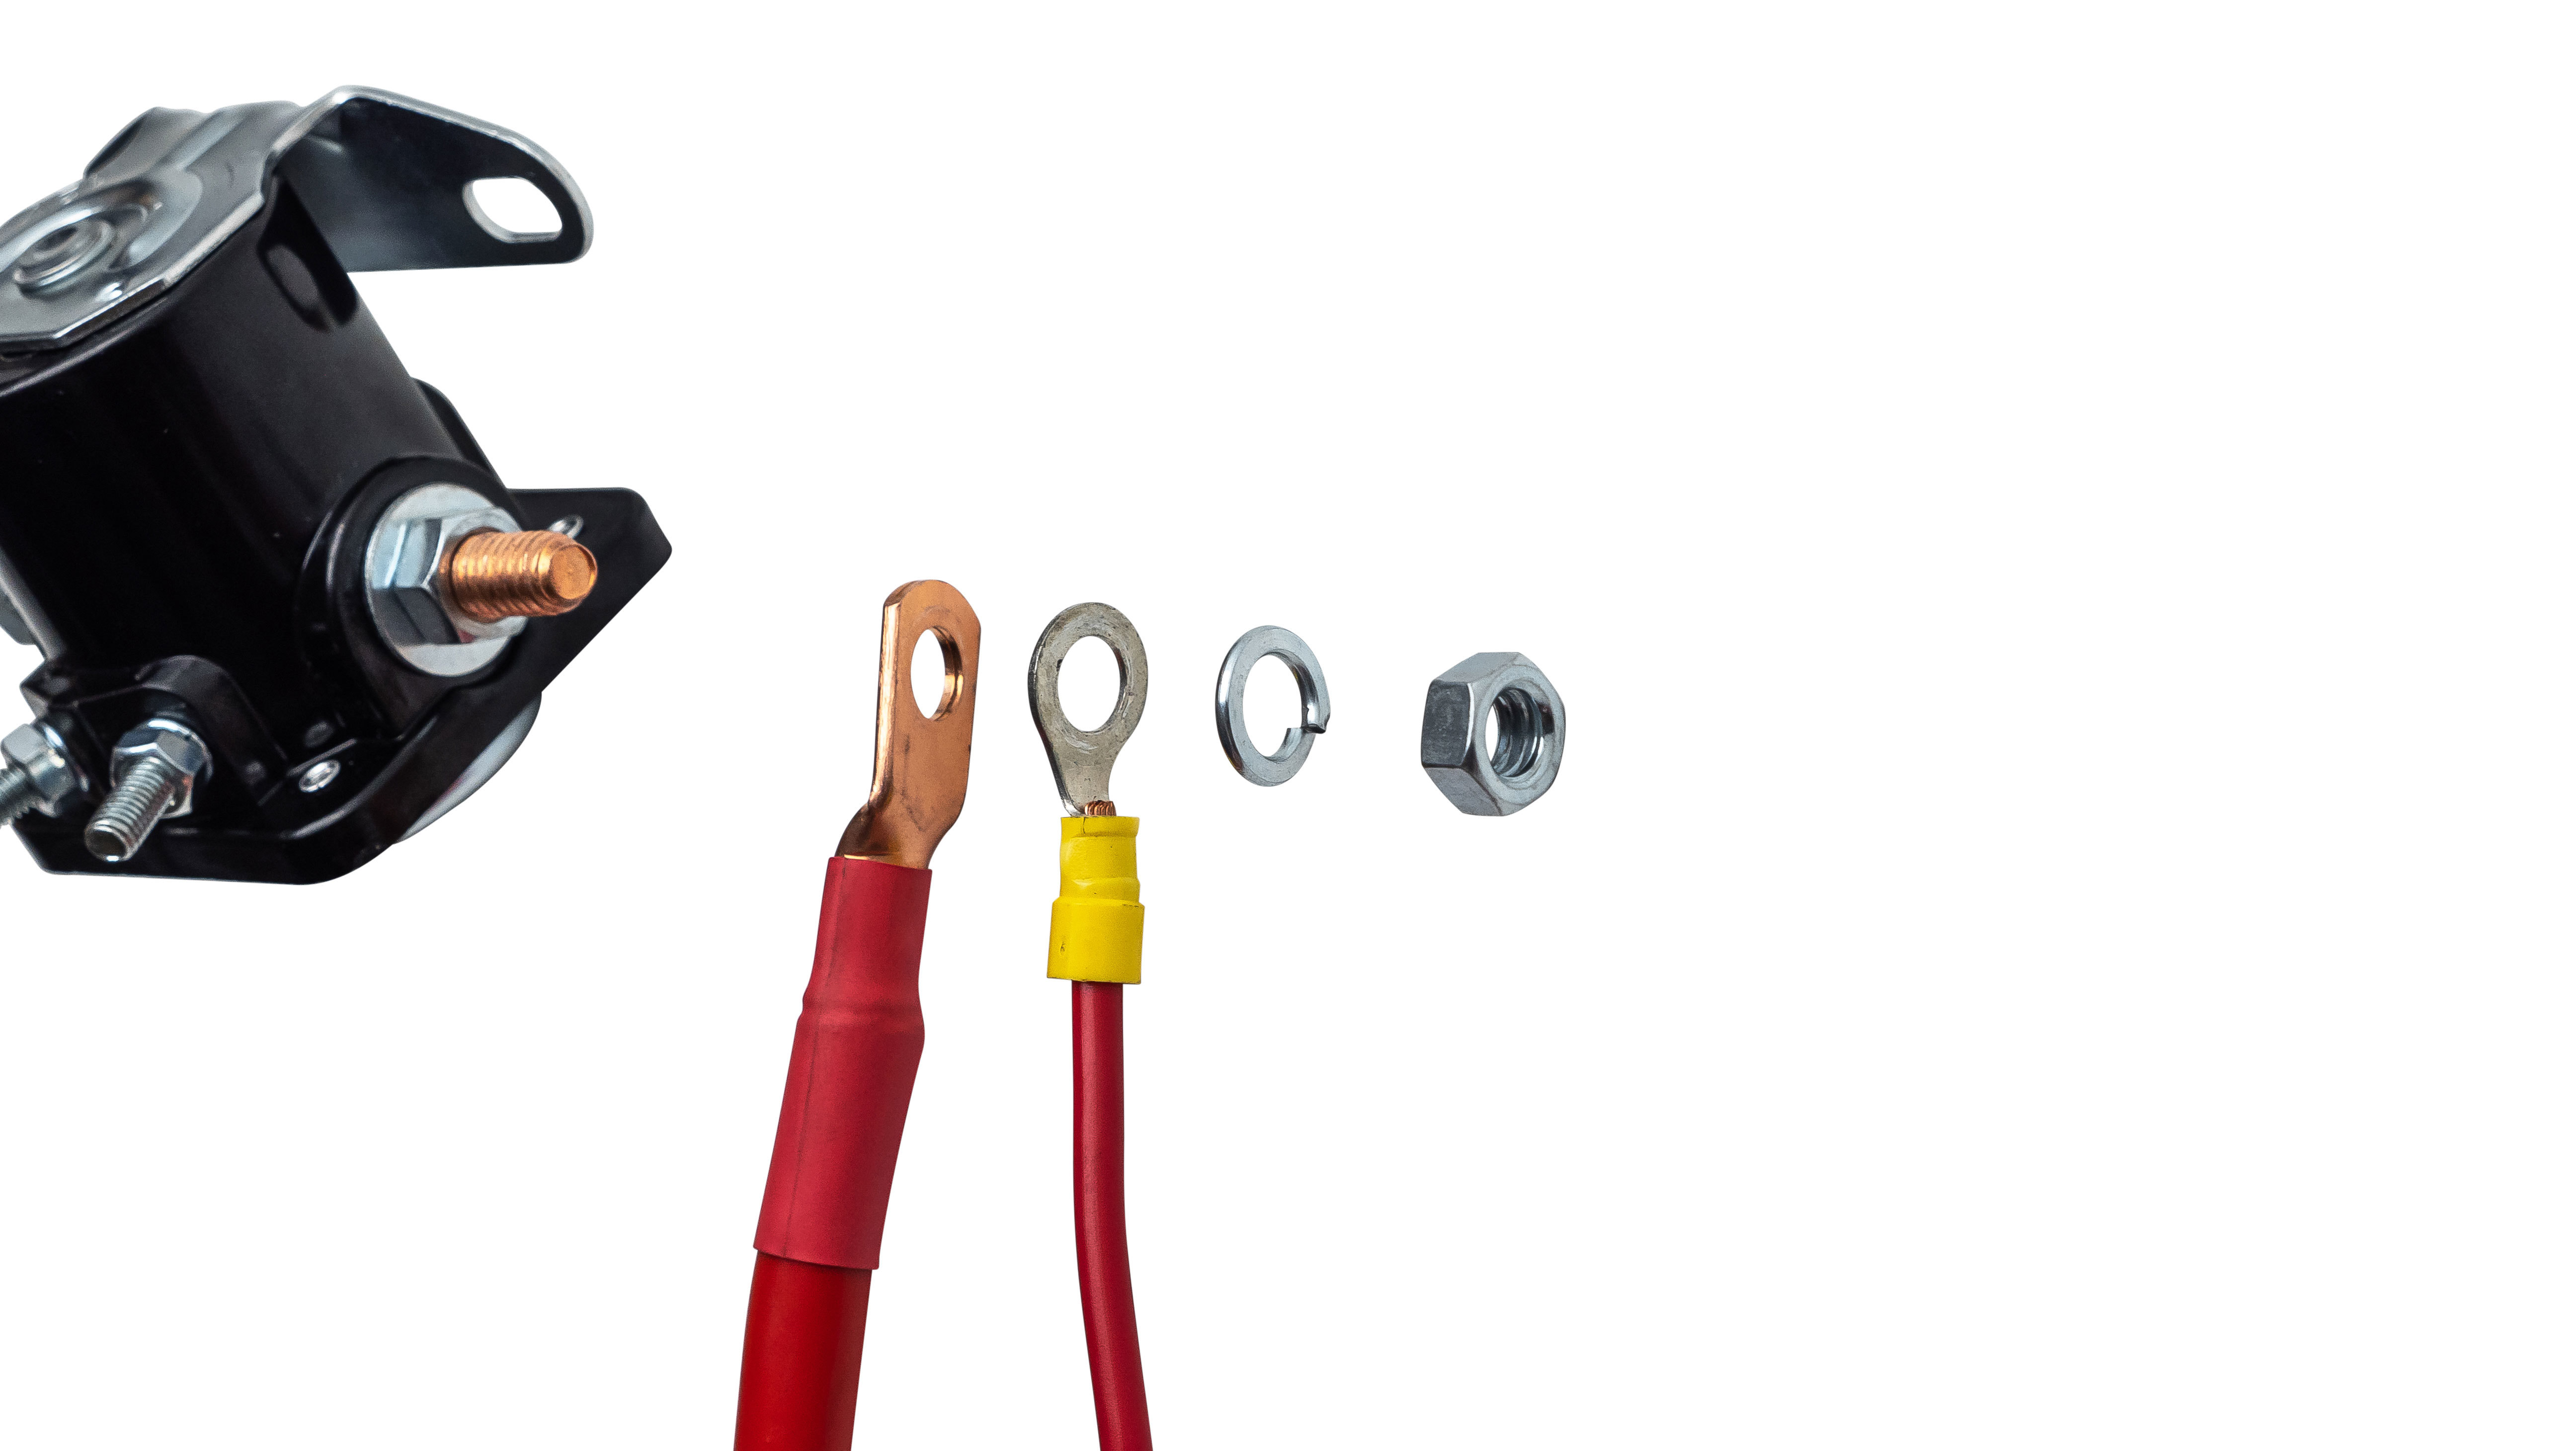
Option 2: The other option is to make a short (5 inch) jumper with the 10 gauge wire going from the flat blade terminal to the large stud on the starter where the starter cable is attached (Image 3)*.
* In both above configurations, the power is not going to the starter until you turn the key to the start position, which is like the factory setup.
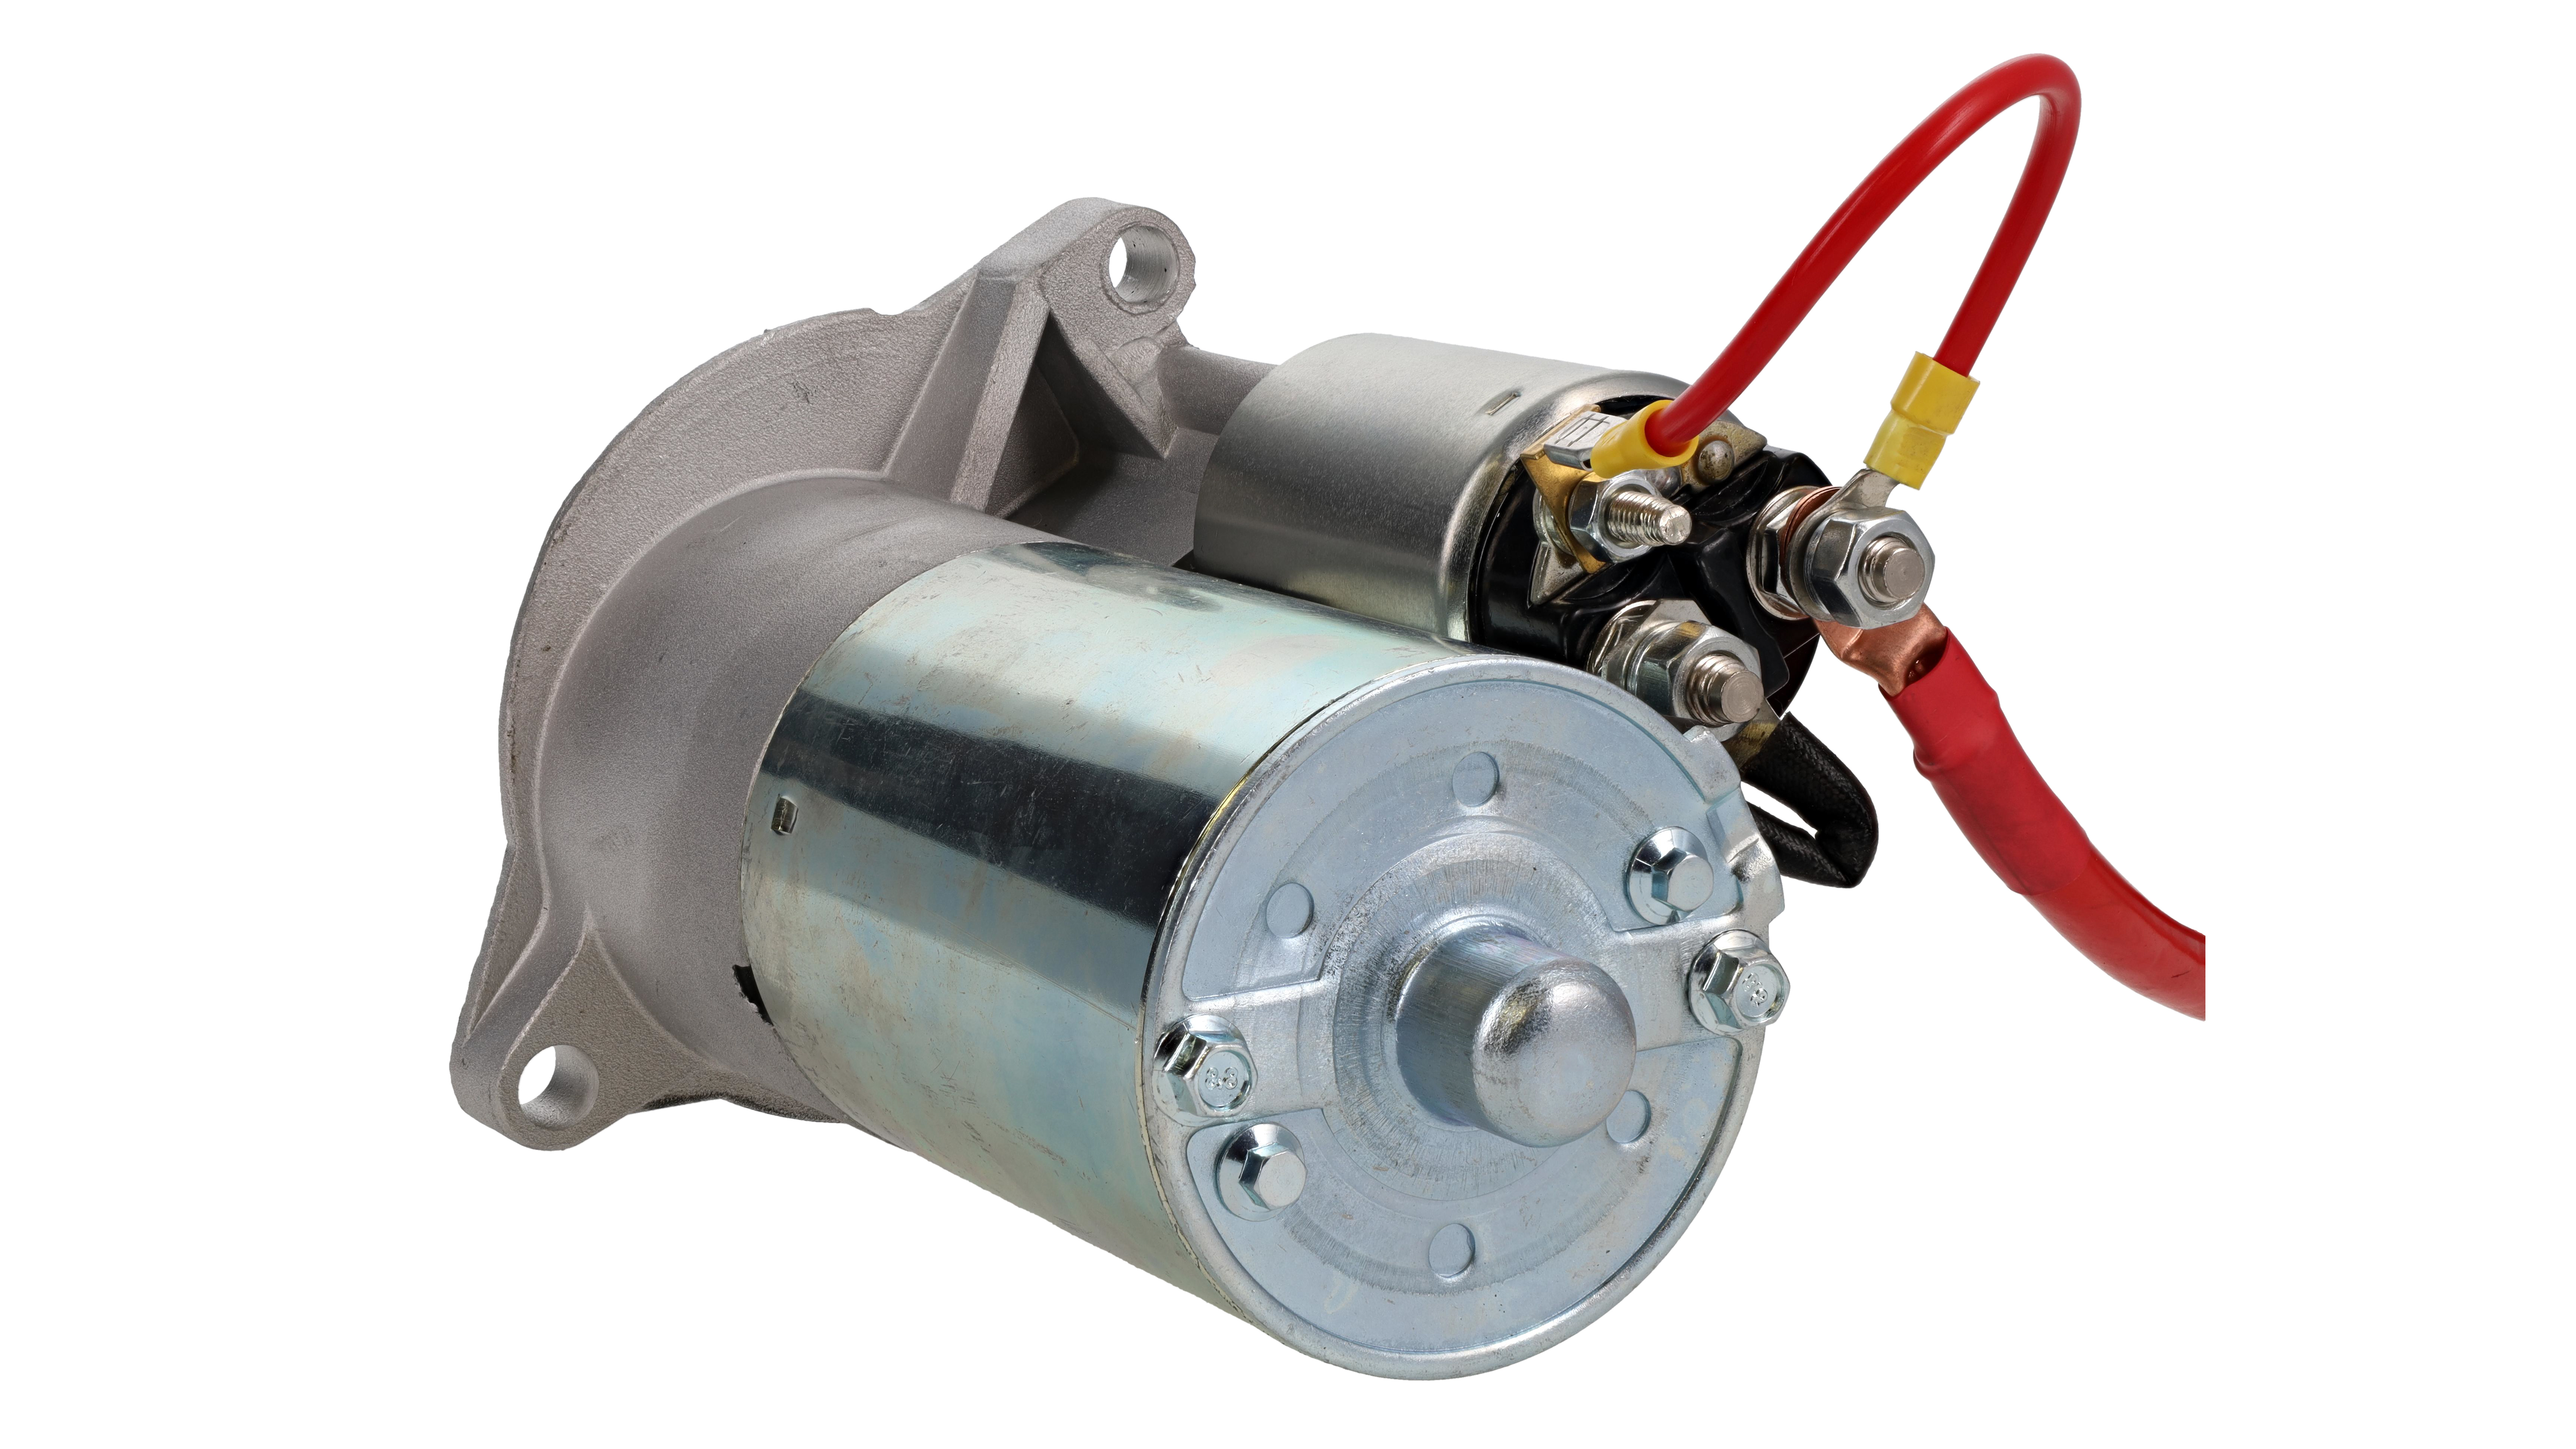
B. In another method, you would attach the 10 gauge wire to the flat blade terminal on the starter, and route it up to the starter solenoid on the wheel well, attaching it to the output side of the solenoid where the starter cable normally attached. Attach the starter cable to the large post on the starter and route it up to either the battery post of the solenoid, or directly to the positive post of the battery (Image 4)**.
** The starter would have constant voltage, and engage when the ten gauge wire was energized by turning the key to the start position. It is important to ensure the wiring is protected and secured away from components such as exhaust with its constant voltage. To prevent shorting, we recommend using a protective sheathing.
You can install the mini starter with the same ⅜” bolts which were removed with the O.E. starter, or with new hardware (not provided).
Ensure the wires are secured to the starter, and clear of any heat sources, or moving parts.
Make sure the battery is fully charged, terminals have been cleaned, reconnect battery cables, and check for proper function.
More Ways To Get Help & Learn More