Extended Radius Arm Mounting Brackets Installation
Have a fire extinguisher ready for safety any time you are cutting or grinding. If you do not feel comfortable welding, please hire a professional for installation.
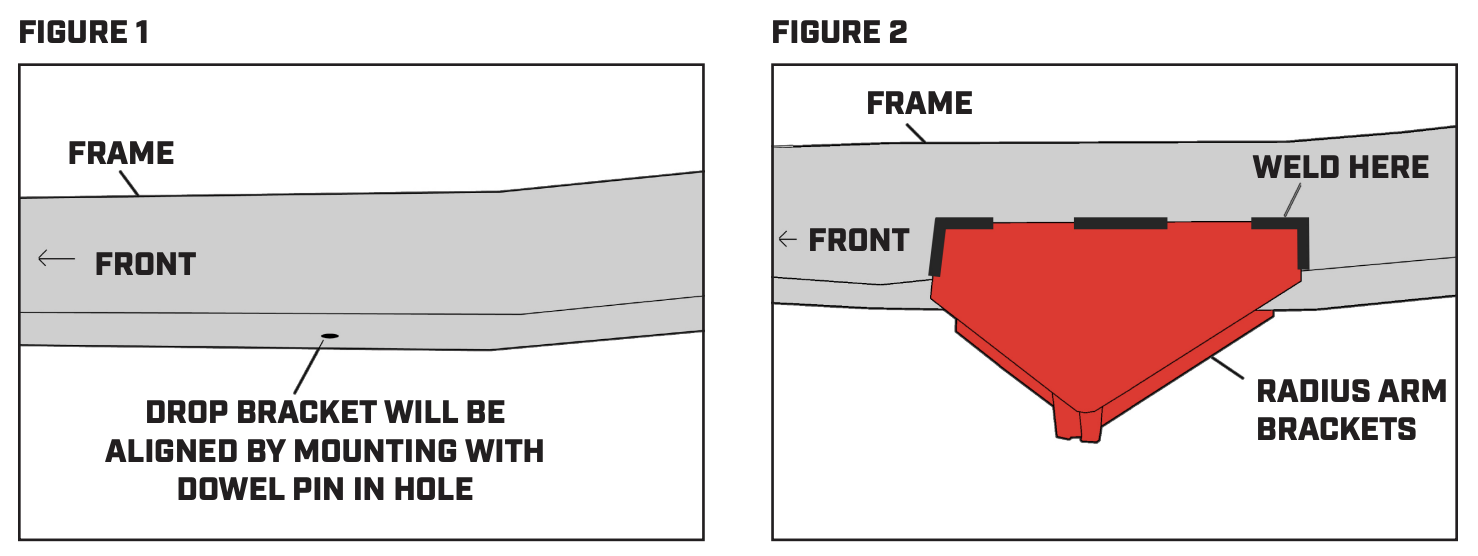
Instructions
Place Bronco on level ground, set the e-brake and chock wheels. Disconnect the negative battery cable.
Remove factory radius arms from factory mounting brackets.
Carefully cut off factory radius arm brackets, making sure not to damage frame and grind/sand frame smooth.
Paint area of frame where factory brackets were removed to prevent rust.
Clean area on frame where new extended brackets will be placed (roughly 11” back from the factory brackets). Check that brake lines, fuel lines and all electrical wiring are clear of the new mounting area and will not interfere.
Place driver bracket on driver frame rail oriented so that the front bushing surface area angles outward toward the tire. There is a dowel pin on the top of the bracket which will dowel into the factory drain hole on the underside of the frame. Tack weld bracket to hold in place.
Repeat Step 6 for the passenger side bracket.
Double-check all measurements to make sure brackets are in correct location and are oriented properly so that the front bushing surface area angles outward toward the tire on each side. Once confirmed, stitch weld both brackets in place being sure not to warp frame from excessive heat.
- 4.5” Grinder with Cut Off Wheel & Grinding Pads
- Welder Capable of Welding 1/4” Steel
- Fire Extinguisher
 Custom Mounting Brackets for Extended Curved Radius Arm