“No Modify” Power Brake Kit For Early Bronco
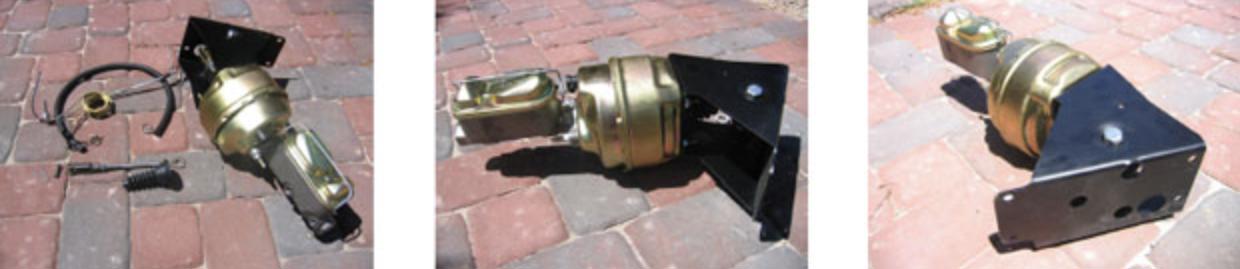
Installing the No Modify Power Brake Kit for Early Bronco
Removal of old master cylinder
Start by removing the brake lines that go from the master cylinder down to the distribution block (also called an “H block” or “pressure differential switch”) If you have a 76-77 Bronco you should have a proportioning valve instead of the distribution block found on earlier models. After removing the brake lines plug them to avoid air and moisture getting into your brake system.
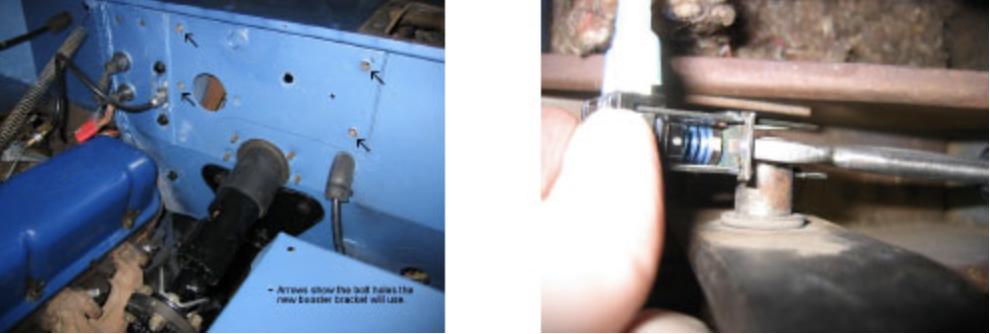
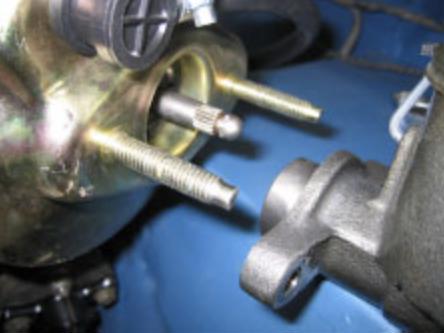
Take a measurement of the brake pedal height from the floor board. You’ll need this later when adjusting the new connecting rod. Now, from under the dash disconnect the rod at the brake pedal. Save the clip and any bushings. Now unbolt the master cylinder from the firewall. The new booster bracket uses one of the master cylinder bolt holes as well as 3 others. You’ll need to remove those three bolts. See the arrows on the photo above. Now is a good time to clean and repaint your firewall if it needs it.
Installing the booster
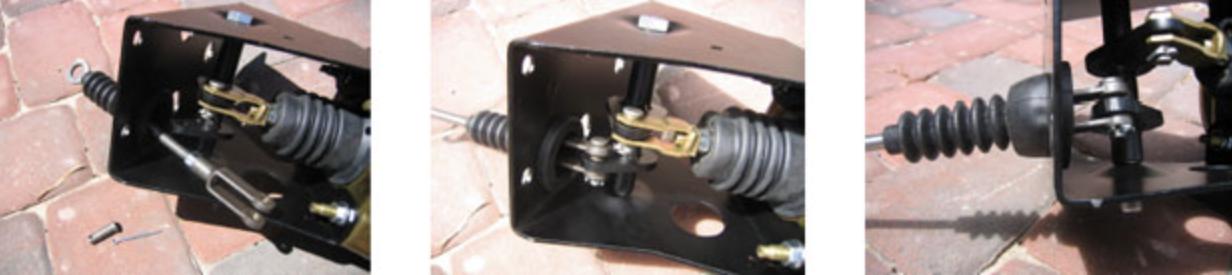
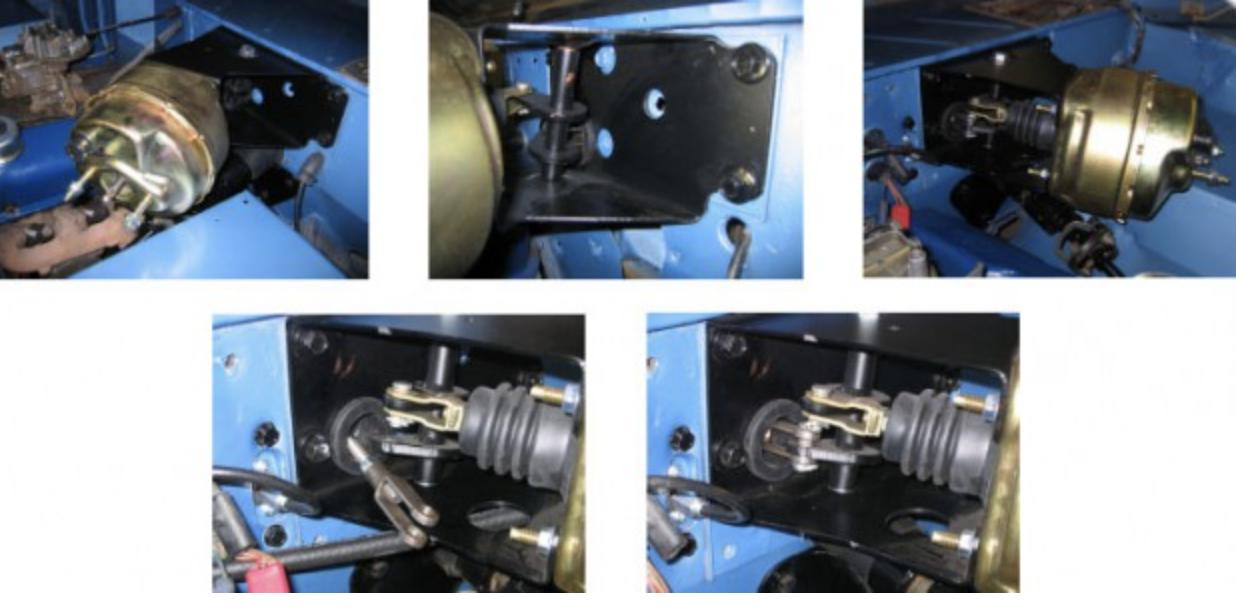
Place the booster against the firewall and secure with the 4 bolts. Now adjust the length of the pedal-to-booster connecting rod so that your brake pedal is at the same height it was previously. Tighten the lock nut to secure the rod fork. Then reconnect the rod fork to the booster bracket arm with the supplied pivot pin. Be sure to secure with a cotter pin.
Bolting up the master cylinder
Before bolting the master cylinder to the booster you need to adjust the length of the push rod sticking out of the booster. There should be about 1/16″ of play before the push rod engages the master cylinder.
To get this play, start by threading the tip of the push rod out until the master cylinder no longer pushes up snub against the booster.
Then thread the tip in just enough so the master cylinder just slides up to the booster without pushing on the rod. This will be your point of no play.
Now take the master cylinder off and thread the tip of the rod in 1/16″. Bolt the master cylinder to the booster.
Bench bleeding
You should always bleed the master cylinder to get rid of any air. Air in the master cylinder will go straight into the brake lines and make it that much harder to bleed the system afterwards. This is called “bench bleeding” although you can do it on your bench or attached to the vehicle. Pick up a simple kit from your local parts store, which will include various size fittings and 2 rubber lines. Thread the fittings into the master cylinder, attach the tubes and loop them back into each reservoir. (You can avoid buying this kit if you don’t mind destroying your old master cylinder hard lines. Just cut them and bend them back into the reservoirs.)

Next fill each reservoir with brake fluid to about 1/2″ from the top. Don’t overfill. Make sure the tubes are secure (tape them to the MC if you have to) and SLOWLY pump the brake pedal. (If you are bench bleeding use a large screw driver to push on the master cylinder) Keep an eye on the brake fluid level and add fluid as needed to be sure the tubes stay submerged. When you stop seeing bubbles the bleeding is done. Brake fluid is almost as bad as paint remover. You may want to lay a rag under your master cylinder while bleeding to avoid spilling any fluid onto painted surfaces.
Installing brake lines
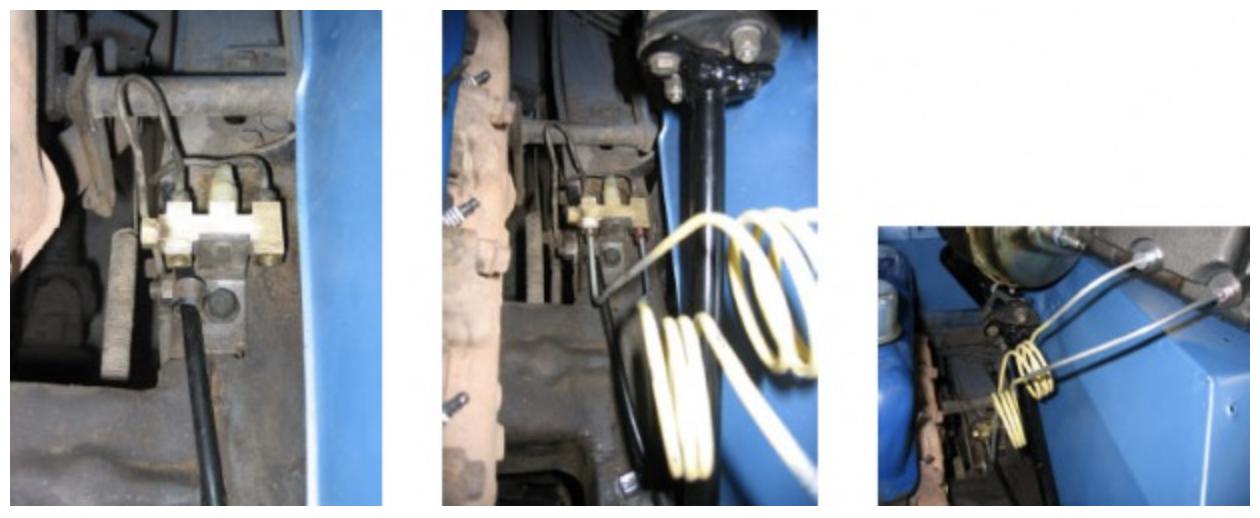
Now it’s time to attach the brake lines from the master cylinder to the H-block (or distribution block). The H-block shown is the most common configuration on drum brake Broncos and is always confused with a proportioning valve. This IS NOT a proportioning valve. It’s only a junction for the brake lines, which also serves as a brake warning light switch. It wasn’t until 1976- 77 that Broncos came stock with proportioning valves.
We highly recommend getting new brake lines. The brake lines we carry fit perfectly and made the install simple. If you need to adjust them be very careful not to crimp or make any sharp bends. Always use flare wrenches when working with brake line fittings. Normal open end wrenches can round off the corners. Don’t use teflon tape on brake line threads. Brake lines seal using the flared seat at the end of the lines, not the threads. If you have a leak it’s because the seat isn’t sealing properly, not because fluid is getting past your threads.
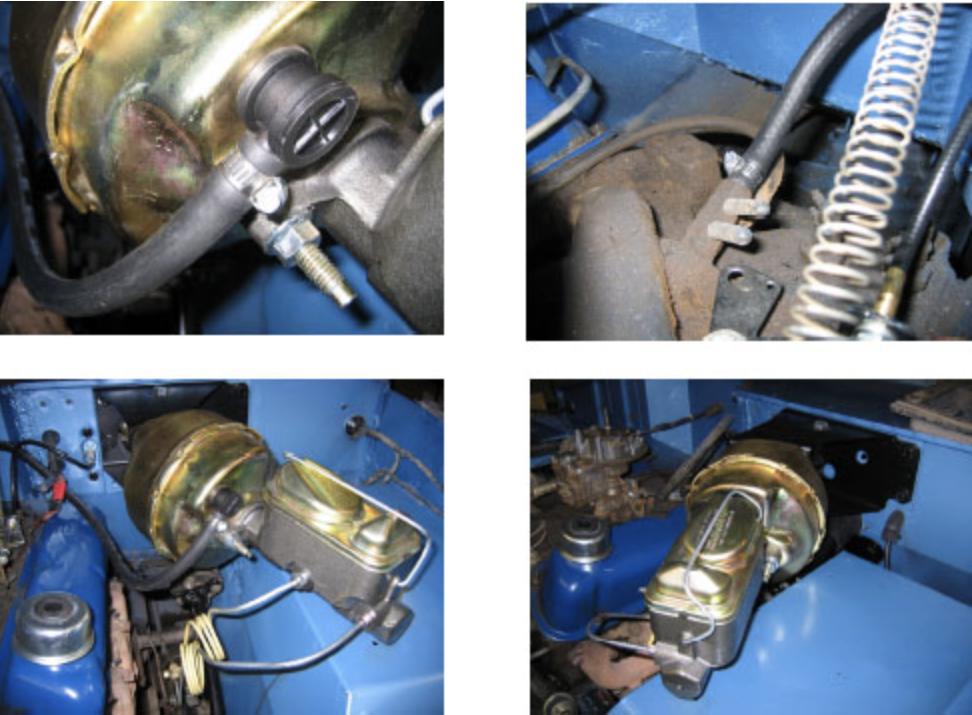
Hook up the vacuum
Attach the supplied vacuum hose to the check valve at the booster. Attach the other end of the hose to a vacuum source on the intake manifold as shown. Note: you may need to purchase a port fitting if there is no extra vacuum port available on the intake manifold. Be sure to route the vacuum hose away from exhaust/headers and steering
components.
Attach the brake pedal
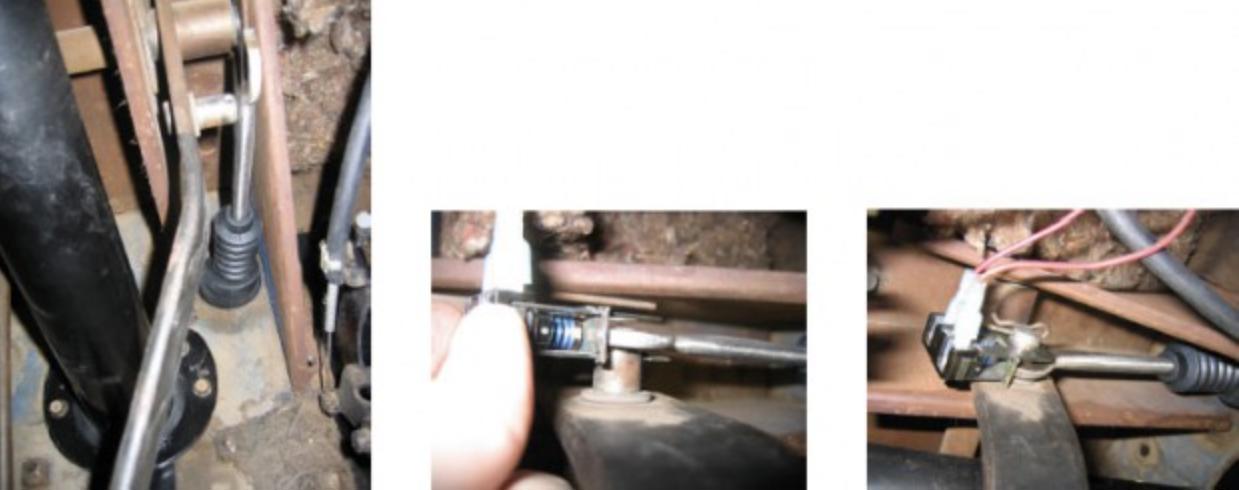
Now climb under the dash and reattach the brake pedal and switch to the push rod. Use your old clip (check that it’s in good shape) and any bushings you took off originally. Be sure to check that your brake lights go on when you step on the pedal.
Final inspection and test drive
Testing time! Remember, these are your brakes you’re dealing with. It doesn’t get much more important than that.
Check (and double check!) all of the brake line fittings to be sure none are leaking. Then check that you filled the master cylinder after bleeding and that the cap is secure. Also check that your brake pedal is securely attached to the rod. And finally, check that the pedal operates smoothly with no binding or loose feel.
Take it for a SLOW test drive around the block. Give yourself some time to get used to the different feel and how quickly it brakes. Once you’re sure everything is safe and working properly, go have fun!
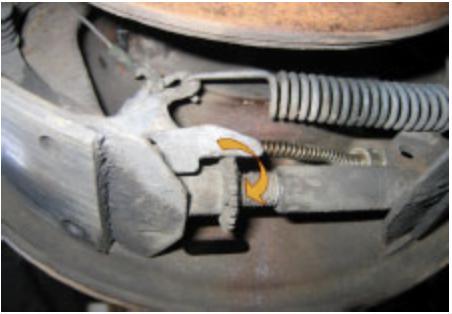
Rear drum adjustment
We recommend adjusting the rear brake drums for optimum stopping power. If the rear shoes aren’t adjusted properly they take too long to kick in resulting in a lurching stop.
Remove the tire and brake drum. This is a great time to inspect, clean and replace any needed parts or shoes. Adjust the “self adjusting” star wheel so that the brake shoes spread out. Adjust as needed until the drum just barely fits back on, but doesn’t drag when you turn it by hand. If you’re confident that your drums are in good shape then you can adjust the shoes without taking off the wheels. Use a flat screw driver (or adjustment tool) through the access hole in the backing plate. Pry the wheel from bottom to top to tighten. Looking from the back of the truck the drivers star wheel goes counter clockwise and the passengers goes clockwise.
- 1 Booster/Master Cylinder/Bracket
- 1 Clevis Pin
- 1 Cotter Pin
- 1 Nut Kit – 2 Larger & 4 Small
- 1 Short Clevis
- In bag: 1 30” Hose, 2 Hose Clamps, 1 Boot, 1 Clevis Pin, 1 Cotter Pin, 1 Push Rod, 1 Set Brake Lines (Drum or Disc), Instruction Sheet
More Ways To Get Help & Learn More